
Cutting foam can seem daunting. Whether you’re refreshing an old chair cushion, creating custom packing material, or tackling a DIY upholstery project, getting a clean, straight cut is crucial. A sloppy job doesn’t just look bad; it can ruin expensive material. Many people believe you need specialized, expensive tools to do it right, but that’s not always the case. As someone who has spent years in the foam machinery industry, I’m here to demystify the process. This article is your guide to achieving precise, professional-looking cuts in various types of foam, from soft upholstery foam to rigid Styrofoam, using tools you might already have. We’ll explore simple techniques, common pitfalls, and when it might be time to consider more advanced solutions.
What Tools Do You Really Need to Cut Foam at Home?
You don’t need a workshop full of expensive equipment to get started. The right tool often depends on the type and thickness of the foam you’re working with. For most DIY projects involving upholstery foam, a few key items will set you up for success. The undisputed champion for cutting cushions is an electric carving knife. Yes, the same kind you use for Thanksgiving turkey! Its two serrated blades move back and forth, sawing through the foam rather than tearing it, which results in remarkably clean, straight cuts. It’s the best way to cut foam for a beginner.
If an electric knife isn’t available, a long, serrated bread knife is a great manual alternative. The key is length and serration. A long blade allows you to make fewer, more consistent strokes, reducing the chance of a jagged edge. For thinner foam or more detailed work, a sharp utility knife or a craft knife can work, but you’ll need to make multiple passes. Regardless of the blade you choose, you’ll also need a good straightedge or ruler and a marker to ensure your lines are accurate.
Here’s a quick comparison of common tools:
| Tool | Best For | Pros | Cons |
|---|---|---|---|
| Electric Carving Knife | Thick upholstery foam, cushions | Fast, clean, straight cuts | Requires electricity, can be noisy |
| Serrated Bread Knife | Upholstery foam | Inexpensive, good control | Slower, requires more effort |
| Utility Knife | Thin foam, detailed cuts | Precise for small areas | Not for thick foam, requires many passes |
| Hot Wire Cutter | Styrofoam, EPS foam | Extremely precise, smooth finish | Only for certain foams, produces fumes |
How Do You Prepare Your Foam for a Perfect Cut?
Preparation is 90% of the battle when it comes to foam cutting. Rushing this step is a guaranteed way to end up with a lopsided cushion or a crooked edge. First, lay your block of foam on a large, flat surface like a workbench or the floor. A stable table is ideal. Before you make a single mark, let the foam expand fully if it was compressed for shipping.
Next comes the marking. Use a high-quality felt-tip marker and a long metal ruler or a T-square to draw your cutting lines directly onto the foam. Don’t eyeball it! Measure twice, and then measure a third time for good measure. If you’re replacing an old cushion, you can use the old fabric cover or the worn-out foam itself as a template. Simply lay it on top of the new foam and carefully trace the outline. For a new project, like a bench seat, create a paper or cardboard template first. This allows you to test the fit and make adjustments before committing to cutting the expensive foam. Once your lines are marked, you have a clear guide to follow, which is essential for achieving that perfect, straight edge.
What’s the Best Way to Cut Thick Upholstery Foam for a Chair Cushion?
Replacing the foam in a chair or sofa cushion is one of the most common DIY upholstery projects. This is where the electric carving knife truly shines. To get the best results on a thick piece of foam, you need to use a technique that prevents the blade from binding or wandering. The secret is compression. Place a sturdy board or a large piece of plywood on top of the foam, right along your cutting line. Then, apply pressure by kneeling or pressing down firmly with one hand.
This does two things: it stabilizes the foam and it thins the section you are about to cut. Now, holding the electric knife straight up and down, turn it on and guide it along your marked line, keeping the side of the blade pressed against the edge of the board. The board acts as a guide, ensuring a perfectly straight, vertical cut. Let the knife do the work; don’t force it. This method works wonderfully for a new dining chair seat, an outdoor bench, or even a custom mattress topper. For a very thick foam block, you may need to cut halfway through, then flip the foam and repeat the process from the other side, meeting your first cut in the middle. This simple trick makes cutting a thick foam cushion an easy and satisfying task.
Can You Really Use a Kitchen Knife to Cut Foam?
Absolutely, though with some caveats. If you don’t have an electric kitchen knife, a standard long, serrated bread knife is the next best thing. Its saw-like edge is much more effective at cutting foam than a smooth blade, which tends to drag and tear the material. The process is similar to using an electric knife, but it requires more patience and physical effort. Just like with the electric version, compressing the foam with a board will help you get cleaner, straighter cuts.
A non-serrated chef’s knife or a utility knife is a poor choice for thick upholstery foam. You would have to press incredibly hard, and the blade would likely create a jagged, messy edge. However, a sharp utility knife is useful for thinner foam sheets (under an inch thick) or for cleaning up small imperfections on the edge of the foam after a larger cut. If a manual knife is your only solution, make sure it’s as sharp as possible. Some people suggest spraying the blade with a silicone lubricant to help it glide through the foam more easily. This can help, but it’s no substitute for using the right type of knife in the first place. The goal is to slice the foam, not tear it apart.
How Do You Achieve Precise Shapes and Curves in Foam?
Cutting straight lines is one thing, but what about curves for a rounded chair seat or a custom-shaped pillow? This requires a bit more finesse. For gentle curves, you can often still use an electric carving knife, guiding it slowly and carefully along your traced line. For tighter curves or more intricate shapes, this tool can be too clumsy. This is where a smaller, more maneuverable blade becomes necessary. A long, thin serrated knife, sometimes called a fillet knife, can work well.
The key to a good curve is to keep the blade perpendicular to the foam at all times. If you angle the blade, you’ll end up with a beveled edge. It helps to cut away large chunks of excess foam first, getting closer to your final line in stages. Think of it like a sculptor roughing out a block of stone before adding details. Cut a series of short, straight lines around the curve to remove the bulk of the material, and then go back to smooth the edge. For a very precise shape, especially in thinner foam, a craft knife or scalpel allows for maximum control. This is a slow process, but it’s the best way to get a custom design without specialized equipment. In industrial settings, achieving complex shapes is done effortlessly with advanced machinery like an EPS Shape Moulding Machine, which uses molds to create identical products with perfect precision every time.
What is a Hot Wire Foam Cutter and When Should You Use It?
When you move from soft upholstery foams to rigid foams like Styrofoam (Expanded Polystyrene or EPS), the cutting methods change. While you can cut Styrofoam with a knife, it often creates a huge mess of tiny, static-charged beads. The superior tool for this job is a hot wire foam cutter. This device uses a thin, taut wire that is heated by an electrical current. As the hot wire passes through the foam, it melts the material in its path, creating an incredibly smooth, sealed edge with no dust or debris.
This is the most precise way to cut foam of this type, allowing for intricate shapes and lettering. You can buy handheld hot wire cutters for small projects or build a larger "harp" or table-style cutter for bigger sheets. The main things to be aware of are safety and ventilation. The melting process releases fumes, so you must work in a well-ventilated area, preferably outdoors or with a fan. Also, be careful not to touch the hot wire—it works just as well on skin as it does on foam. Never use a hot wire cutter on polyurethane foams (like a mattress or cushion foam), as they release much more toxic fumes when subjected to heat. A hot wire is strictly for polystyrene and similar thermoplastic foams.
Is Cutting High-Density Foam More Difficult?
Yes, cutting high-density or very firm foam presents a greater challenge. The dense structure of the material offers more resistance to the blade, making it harder to push a knife through and maintain a straight line. A dull blade will snag and tear the foam, so using a very sharp tool is non-negotiable. This is another scenario where the power of an electric carving knife is a huge advantage, as its sawing action does the hard work for you.
When cutting high-density foam manually, the compression technique is more important than ever. You need to apply significant, even pressure along your cutting line to help the knife pass through. For very thick and firm foam, such as that used for a supportive seat cushion or commercial furniture, you may need a longer, more robust blade. Some professionals use specialized foam saws, which are essentially larger, more powerful versions of an electric knife. If you’re struggling to cut the foam, check your blade. A fresh blade in your utility knife or a properly sharpened knife will make a world of difference. The goal is to slice cleanly through the foam’s structure rather than fighting against its density.
How Can You Shred Foam for Filler or Packing Peanuts?
Sometimes, you don’t want to cut foam into a neat shape; you want to shred it into small pieces. Leftover foam scraps are perfect for this. You can shred foam to create filler for a bean bag chair, a dog bed, a throw pillow, or even to make your own custom packing peanuts. The easiest DIY method is to simply tear the foam into small chunks by hand and then feed them into a garden shredder or a wood chipper. Be sure to use a machine with a collection bag to contain the shredded foam and prevent a massive mess.
For a less industrial approach, you can cut the foam into small strips with a knife and then snip those strips into smaller pieces with heavy-duty scissors. This is labor-intensive but effective for small quantities. If you’re dealing with rigid EPS foam, you can break it up inside a sturdy burlap sack to contain the pieces.
"From my experience in manufacturing, I know that waste is a major concern. Every scrap has potential. In our factories, we don’t let anything go to waste." – Allen, Foam Machinery Expert
This is why professional operations use dedicated recycling systems. For instance, a complete EPS Recycling Machine includes a crusher to break down large pieces, a de-duster to remove fine particles, and a compactor to densify the material for reuse. This turns waste into a valuable resource, which is a principle that can be applied even on a small DIY scale by finding a good use for every last scrap of foam.
What Are the Biggest Mistakes to Avoid When Cutting Foam?
Even with the right tools, a few common mistakes can derail your project. Being aware of them ahead of time can save you from a lot of frustration and wasted foam.
- Using a Dull Blade: This is the number one mistake. A dull knife will tear, not slice, the foam, resulting in a ragged, unprofessional edge. Always use a sharp, fresh blade.
- Inaccurate Marking: "Measure twice, cut once" is the golden rule. Take your time with the ruler and marker. Any error in the marking stage will be magnified in the final product. Using masking tape can sometimes provide a clearer line to follow.
- Not Using a Guide: Trying to cut a long, straight line freehand is nearly impossible. Use a board, a T-square, or another straightedge to guide your cutting device. This ensures straight cuts.
- Forcing the Cut: Let the tool do the work. Pushing too hard on your knife will cause the blade to bend or wander, leading to an angled or curved cut when you wanted a straight one. Go slow and steady.
- Ignoring Safety: A sharp knife is a dangerous tool. Always cut away from your body and keep your free hand well clear of the blade’s path. If using a hot wire cutter, work in a ventilated space to avoid inhaling fumes.
- Choosing the Wrong Foam: Make sure the density and type of foam are appropriate for your project. A soft foam won’t work for a supportive chair seat, and a firm foam will be uncomfortable for a back cushion.
Avoiding these pitfalls is the key to transforming a potentially messy job into a smooth and successful DIY project.
From DIY Projects to Industrial Production: When to Upgrade Your Cutting Method?
DIY methods are fantastic for one-off projects like replacing the foam in an old couch or creating a custom seat for your patio furniture. However, if you find yourself cutting foam regularly, or if your projects require a high degree of precision and repeatability, you’ll quickly discover the limitations of a manual knife. The process is slow, labor-intensive, and achieving consistent quality across multiple pieces is challenging. This is the point where a business owner or a serious hobbyist starts looking for a more efficient solution.
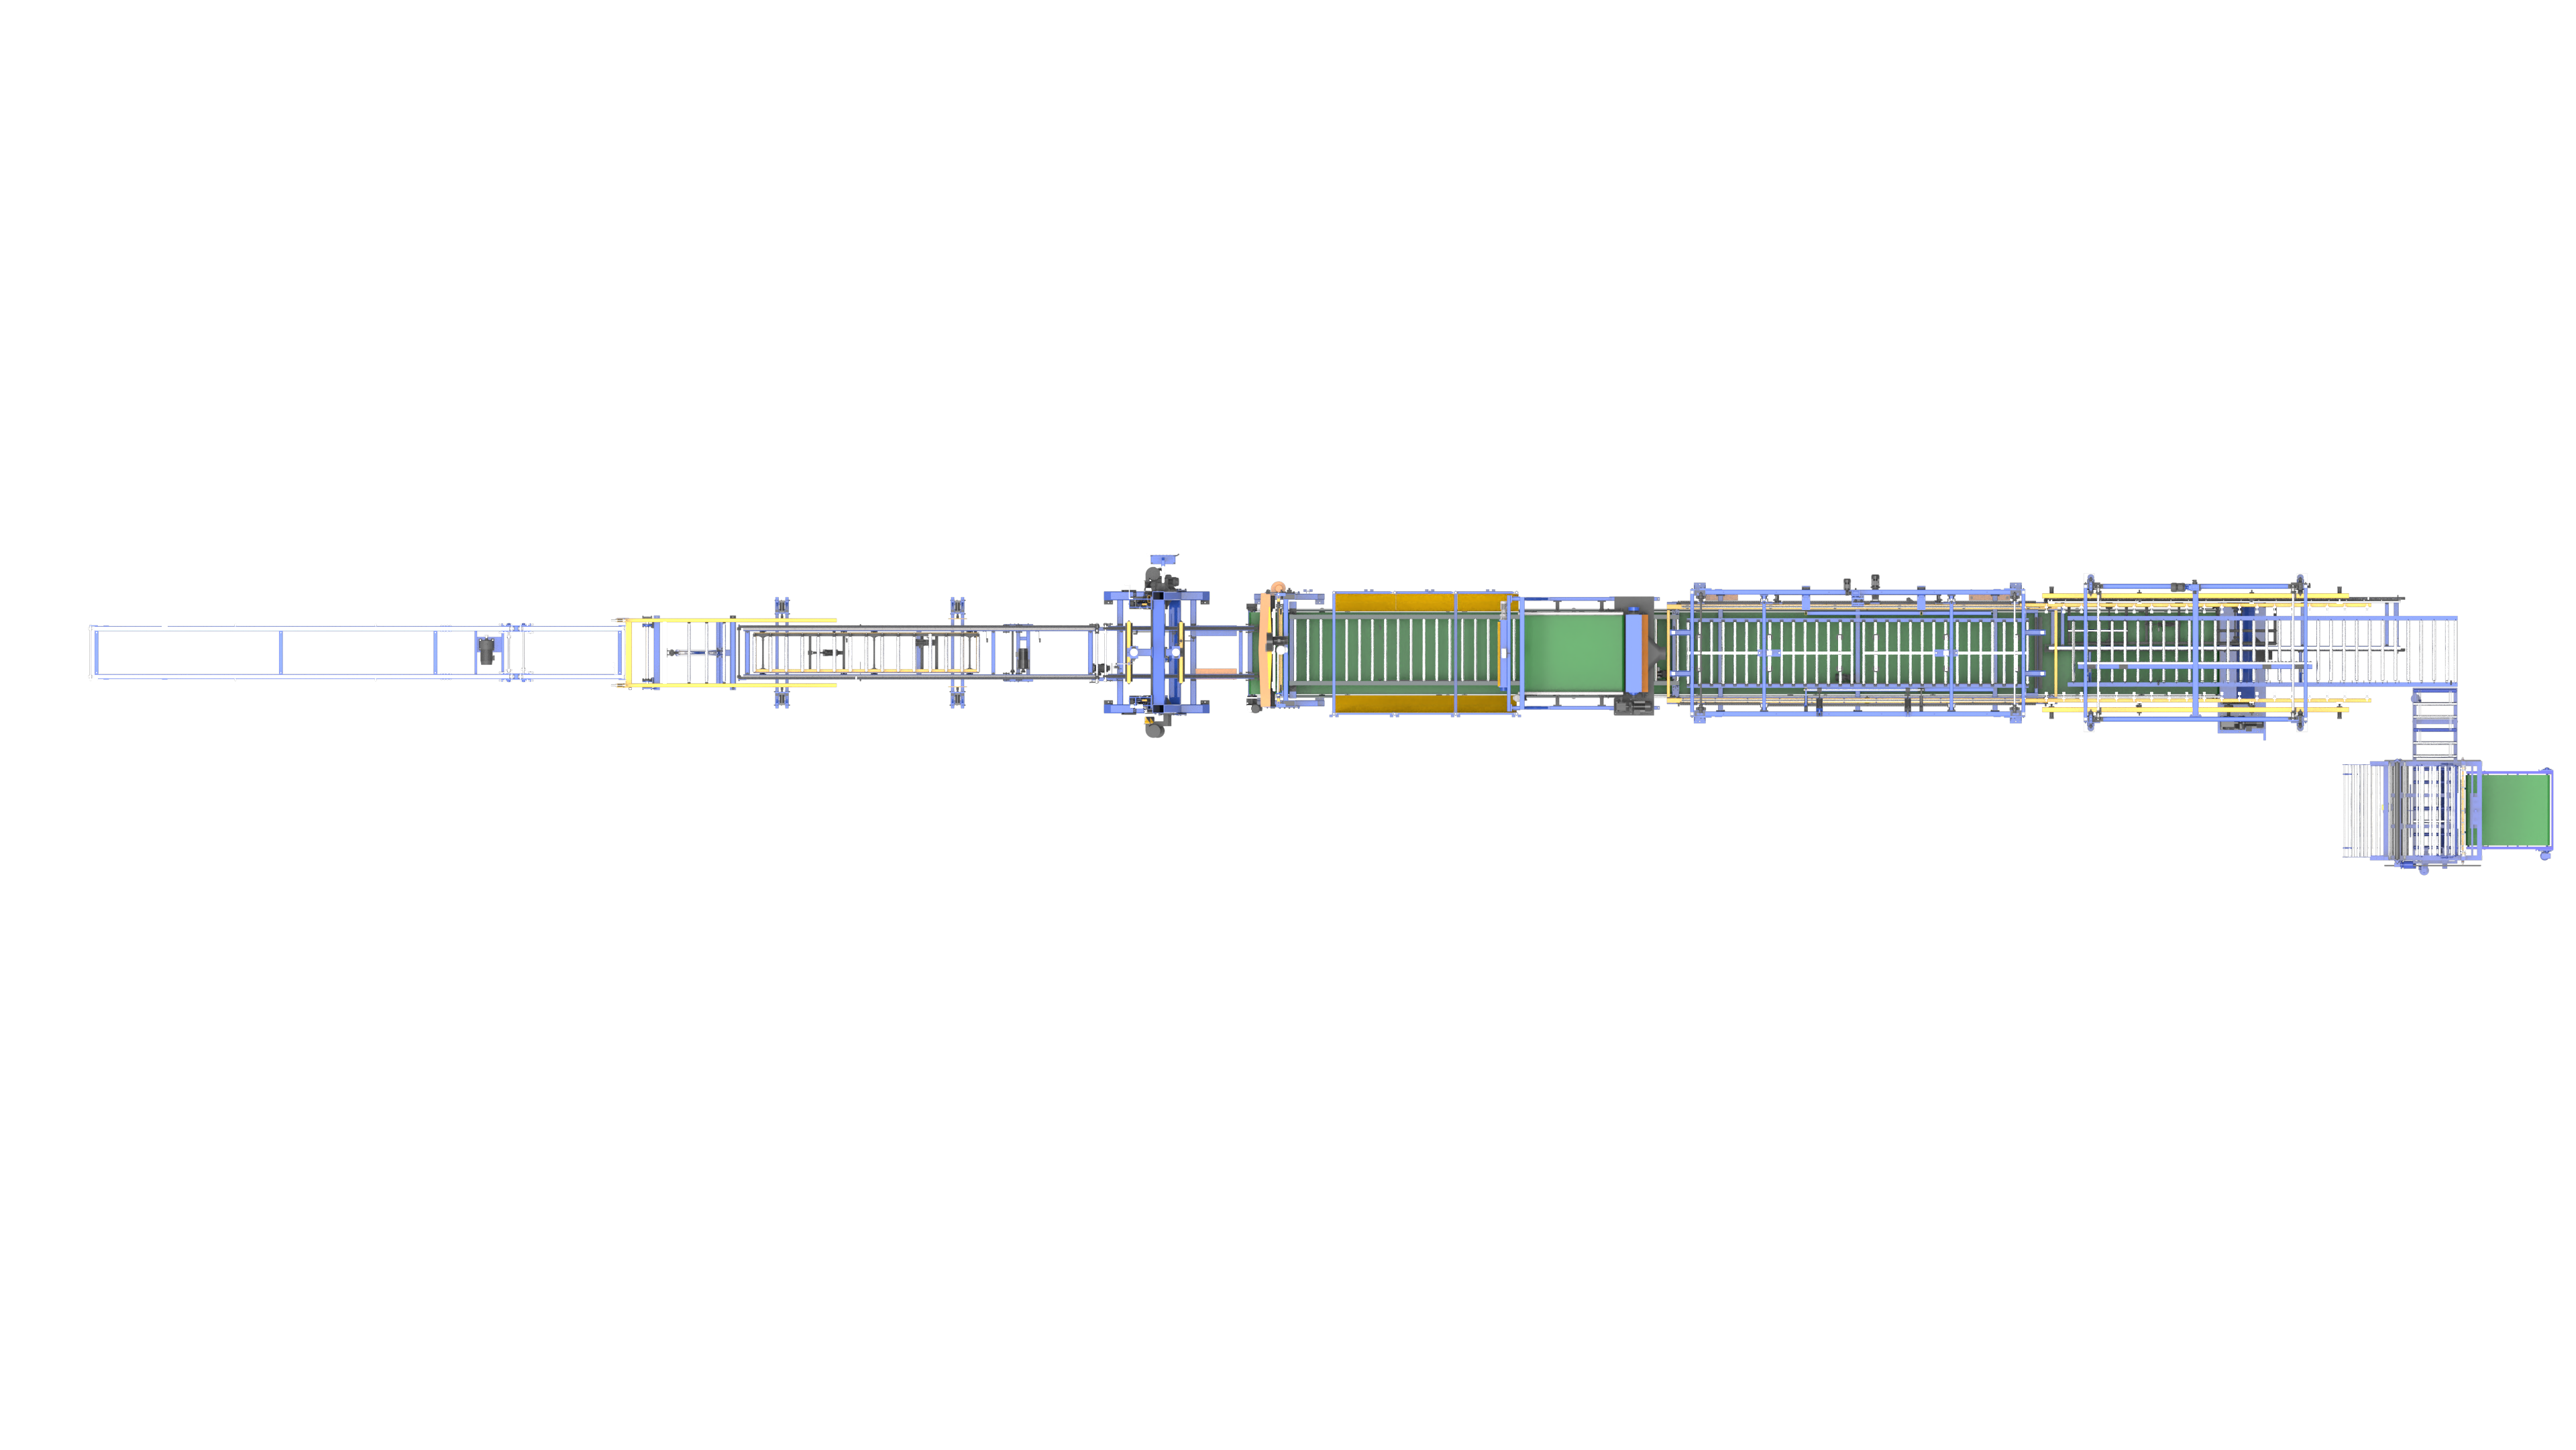
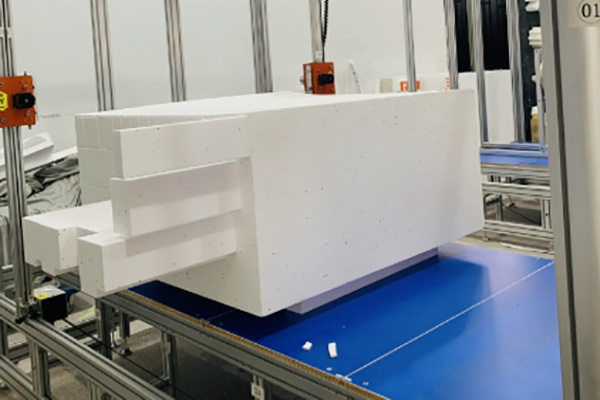
This is the world I work in. When a company needs to produce hundreds of identical foam cushions, insulation panels, or packaging inserts per day, manual cutting is not an option. They upgrade to automated machinery. A professional foam cutting line uses advanced technology to handle large blocks of foam with incredible speed and accuracy. For example, our Best Sale EPS Cutting Line automates the entire process, from loading the foam block to making horizontal and vertical cuts, and even stacking the finished sheets. These machines use computer numerical control (CNC) to follow a digital design, making longer cuts and complex shapes that would be impossible by hand. The upgrade from a handheld electric knife to a fully automatic cutting line is a huge leap, but it’s driven by the need for efficiency, precision, and scalability—principles that any growing business must embrace.
Key Takeaways to Remember:
- Choose the Right Tool: An electric carving knife is best for thick upholstery foam, while a hot wire cutter is ideal for Styrofoam. A sharp, serrated blade is your best manual option.
- Preparation is Everything: Always work on a flat surface. Measure carefully and use a marker and a straightedge to draw clear guidelines.
- Use the Compression Trick: For thick foam, press down on it with a board along your cut line. This stabilizes the foam and helps you achieve a clean, straight cut.
- Let the Tool Work: Whether using an electric knife or a manual one, use steady pressure and let the blade’s sawing action do the cutting. Don’t force it.
- Safety First: Always cut away from your body and ensure proper ventilation, especially when using heat to cut foam.
- Know When to Upgrade: While DIY methods are great for small projects, consistent, high-volume production requires professional machinery for efficiency and precision.
Post time: 06-13-2025