
EPS Block Fusion Defects: A Troubleshooting Guide
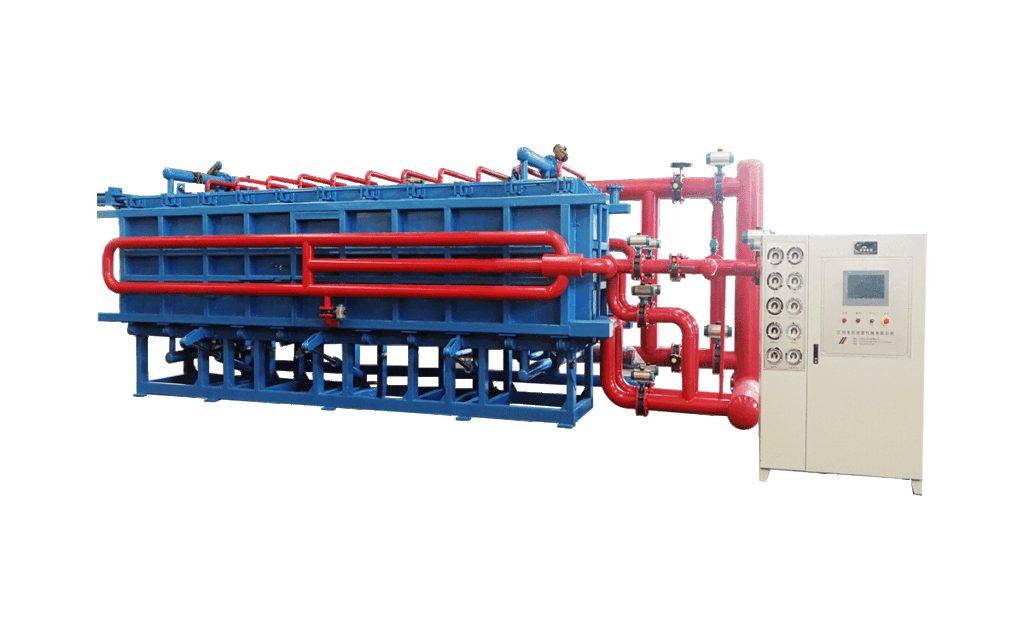
Almost every quality complaint in a block plant traces back to one word: fusion. When beads weld together incompletely inside the mould, the block leaves the line looking acceptable and fails later, in cutting or at the customer. Diagnosing fusion problems quickly is therefore one of the most valuable skills a supervisor on an eps block molding machine line can build. This guide organizes the most common defects by symptom, walks through their usual causes, and gives concrete fixes ordered from cheapest to most involved.
What Good Fusion Looks Like
A well-fused block cuts cleanly, has uniform cell structure across the whole cross-section, and shows no visible bead boundaries on a fractured surface. When you tear a fresh block by hand, the tear should run through beads rather than around them. Anything less, and the questions below apply.
Symptom-Cause-Fix Reference Table
Use the table as a first filter. Work through the causes in order; the most frequent ones are listed first for each symptom.
| Symptom | Likely cause | Fix |
|---|---|---|
| Soft, under-fused core; skin looks fine | Insufficient core steam: steam pressure too low, main too long and wet, or core steam time too short | Raise core steam pressure and time in small steps; check the steam main for condensate pockets and add or repair drainage |
| Soft core only in large blocks | Steam penetration does not reach the centre at the current cycle | Lengthen core steam stage; verify vacuum assist before steaming is pulling properly so steam can travel |
| Surface pitting or bead pop-out | Surface over-fused while core stayed cold: surface steam stage too aggressive or bead too dry | Rebalance surface and core steam stages; check bead maturing time and humidity before filling |
| Weak corners and edges | Poor fill at corners: fill pressure too low, fill gun pattern worn, or bead too coarse for the wall section | Increase fill pressure gradually, inspect and clean fill guns, and confirm the bead size matches the mould design |
| Layered fusion, visible planes inside the block | Uneven steaming across the mould height, often condensate collecting on one face | Check mould plate steam channels and condensate drains; verify the machine is level and drains are not blocked |
| Shrinkage or voids after demoulding | Over-fusion collapsing cells, or vacuum released too late | Shorten total steam time slightly and review vacuum timing; verify cooling water stage is complete before demould |
| Fusion varies block to block | Inconsistent incoming bead density or moisture from the silo | Check pre-expander weigher calibration and silo first-in first-out discipline; log densities per silo compartment |
Steam Staging: Where Most Problems Live
Modern block machines do not simply blast steam for a fixed period. The cycle is staged: a vacuum phase that removes air and pre-softens the bed, a surface steam phase that fuses the skin, a core steam phase that drives heat to the middle, and a cooling phase that stabilizes the block before demould. When a defect appears, identify which stage owns it before touching anything.
Surface symptoms point at the surface stage and at fill quality; core symptoms point at core steam pressure, time and steam quality. A practical rule from the field: change one stage parameter at a time, in small steps, and record the block number, the change and the result. Plants that keep this log solve in days what plants without one chase for months.
Bead Density and Moisture: The Upstream Half of Fusion
The moulder only ever sees what the bead side sends it. Beads expanded below the target density will not weld at normal steam settings; beads expanded inconsistently fuse differently from fill to fill. This is why the pre-expander weigher and the silo discipline deserve attention in any fusion investigation. Confirm that the density logged at pre-expansion matches the recipe the moulder is running, and that silos are emptied in the order they were filled so beads mature for a consistent time.
Moisture matters as much as density. Beads fresh from the fluidized bed need to dry and mature before molding; beads that pick up condensate in cold pipes behave unpredictably in the fill system. If defects appeared after a weather change or a maintenance shutdown, look at the bead side before the moulder.
A Five-Step Diagnostic Routine
- Describe the defect precisely. Where in the block, which face, how deep, on every block or occasionally. Vague complaints produce vague fixes.
- Check the recipe against the log. Confirm current steam stage settings, bead density at pre-expansion and silo age all match the running recipe.
- Tear-test a fresh block. Tear the block by hand at the defect zone: tears running through beads indicate the defect happened during molding; tears around beads point at fusion, and their location tells you which steam stage to inspect.
- Change one parameter and mark the block. Adjust a single stage setting in a small step, tag the affected blocks, and inspect the next batch before touching anything else.
- Escalate in order of cost. Settings, then bead condition, then fill gun maintenance, then mould plate and steam channel inspection. Opening the machine should be the last step, not the first.
Common Misconceptions About Fusion
- More steam time always means better fusion. Past the fusion point, extra steam over-fuses the skin, wastes energy and can collapse cells. The fix for a soft core is penetration, not blanket heating.
- The moulder is always at fault. A surprising share of fusion complaints are solved at the pre-expander weigher or in silo rotation discipline. The moulder inherits what it is given.
- Raising pressure compensates for wet steam. If the main delivers wet steam, more pressure delivers more water. Fix drainage and insulation first; the arithmetic is unforgiving, because a pressure bump that masks the symptom often deepens the skin-core difference.
- Defects that appear in cutting were caused in cutting. Cutting exposes fusion defects, it does not create them. Trace the block number back to its moulding batch.
Frequently Asked Questions
Why is the core of my EPS block soft while the surface looks perfect?
Heat did not reach the centre. Check core steam pressure and duration first, then the condition of the steam main, since condensate pockets cool the steam before it arrives. On large blocks, verify the vacuum phase before steaming so the steam has room to travel through the bed.
What causes pitting on the block surface?
Pitting usually means the surface stage ran too hot or too long relative to the core stage, or the beads were too dry when filled. Rebalance the steam stages and check maturing time; both fixes are settings, not hardware.
Can bead density alone cause weak corners?
It contributes, but corners are primarily a fill problem. Low fill pressure, worn fill guns or a bead size mismatched to the mould leave corners loose before steam ever arrives. Fix the fill first, then look at density spread.
How do I tell a fill problem from a steam problem?
Fill problems are positional and repeatable: the same corners or the same layers are loose on every block. Steam problems follow the heat: surface versus core, or one face of the mould versus the other. Tear-test a few blocks and map where the unfused zones sit.
When should I call the machine supplier?
When settings, bead condition, fill guns and drainage have all been verified and the defect persists. Bring your log: block numbers, parameters changed and results. A supplier who receives a tidy one-variable log can usually identify the remaining cause quickly. If you are stuck on a persistent defect, contact our team with your cycle parameters and bead densities, and we will help you work through it. You can also review our horizontal EPS block molding machine and eps pre-expander machine pages to see how the two sides of fusion are engineered together.