
EPS Cutting Line Maintenance: Wire Care, Calibration and Steady Throughput
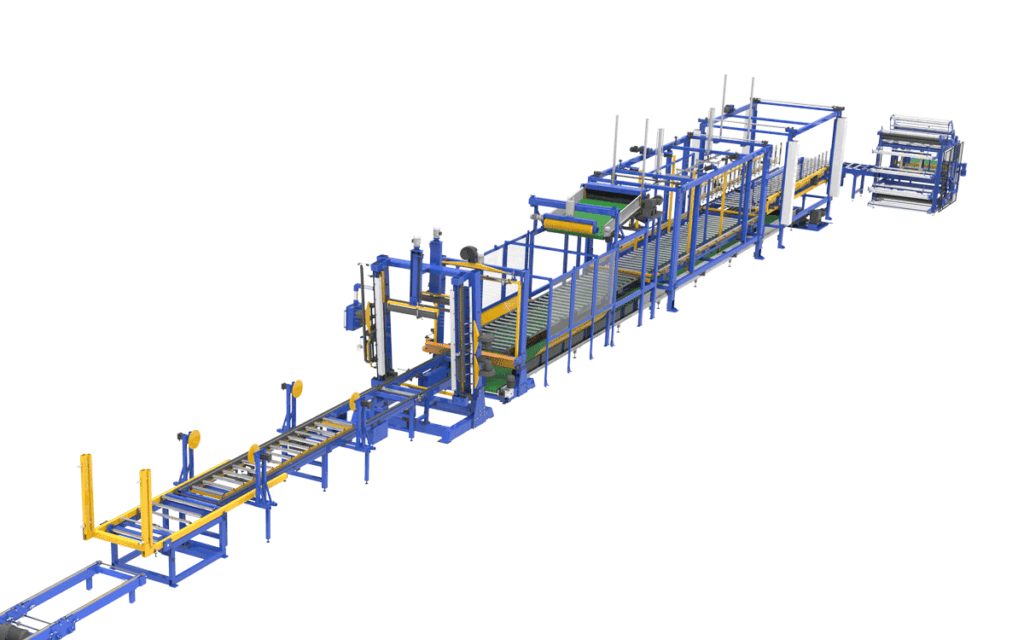
An EPS cutting line is only as accurate as its wire and its calibration. A worn wire or a twisted frame quietly drops edge quality and slows the whole block line behind it. This guide covers the routine that keeps a cutting line cutting true and the faults that steal throughput.
Why the cutting line sets the pace
The cutter sits after the block molding machine and before any CNC shaping. If it bottlenecks, moulded blocks queue up; if it cuts sloppy, every downstream shape inherits a bad edge. Maintenance here protects the whole plant’s rhythm.
What the line is sized to do
Cutting lines in the SPQ-2000B to SPQ-6000B range handle block lengths 2,000–6,000 mm at about 1.8–2.0 m/min at 15 kg/m³. Match the cutter length to your moulded block length — sizing it for a shorter block forces you to cut blocks in half first.
| Model | Block length | Cut speed @15 kg/m³ | Typical use |
|---|---|---|---|
| SPQ-2000B | 2,000 mm | 1.8–2.0 m/min | Small-shape, sample runs |
| SPQ-4000B | 4,000 mm | 1.8–2.0 m/min | Standard block + shape split |
| SPQ-6000B | 6,000 mm | 1.8–2.0 m/min | Long board, high-volume lines |
Wire care
- Tension. No slack, no kinks. A slack wire bows the cut; an over-tensioned wire snaps mid-run.
- Cleanliness. Dust on the wire path hides the cut line and degrades edge quality — a clean cutter cuts cleaner.
- Replacement cadence. Treat wire as a consumable. Swap at the first sign of uneven cut, not after it fails.
Calibration checklist
- Level the frame. A twisted frame bows the wire and ruins accuracy (our cutting machine tolerances note covers why).
- Confirm power and earth. Wrong voltage damages the transformer and wire supply.
- Thread and tension the wire. Verify tension along the full stroke.
- Load the program and jog. Test axes before any production cut, then prove on a scrap block.
Common faults and quick fixes
| Fault | Likely cause | Fix |
|---|---|---|
| Wavy edge | Slack or worn wire | Re-tension or replace wire; check frame level |
| Slow cut | Density above program | Confirm bead density; raise program to match |
| Burnt edge | Wire too hot / too slow | Lower temperature or raise feed |
| Wire snaps | Over-tension / kink | Reset tension; inspect guides |
| Dust build-up | No extraction | Clean rails; add local extraction |
Mistakes that cut throughput
- Running one density program for all work. Higher-density board cuts slower; confirm the real density and set the program to it.
- Skipping frame level. The cheapest accuracy win is a level frame — ignore it and you re-cut everything.
- Treating wire as “fit and forget”. It is a consumable; scheduled replacement beats mid-run failure.
Frequently Asked Questions
How do I know the wire needs replacing?
The first wavy or burnt edge, or any snap, means replace it. Don’t wait for a second failure — an uneven cut propagates into every downstream shape.
Why does density change my cut speed?
Cutting speed is quoted at a reference density (15 kg/m³). Higher-density board resists the wire, so budget toward the low end and confirm on a sample cut.
Cutting line or CNC for my work?
A line is for straight block and board cuts at volume; a CNC is for contours and 3D shapes. Many plants run both — line first, CNC for the shaped part.
How often should I level the frame?
Check it at commissioning and after any move; re-verify if edges drift. A level frame is the baseline every cut depends on.
A cutting line rewards discipline: tensioned wire, a level frame, and a program matched to real density. For a wire and calibration spares list matched to your cutting line, EPS block molding machine, steam is the raw energy that fuses pre-expanded bead into a rigid block. The machine is mostly a pressure vessel around that fact: get the steam right and fusion is even; get it wrong and you chase the symptom for months. This guide covers the three parts that decide block quality — the accumulator, pressure staging and drainage — plus the steam quality and trap details that separate a stable line from a drifting one.
\n\n
Why steam quality is the whole game
\n
Bead leaves your pre-expander at a target density and ages in the silo. The moulder\’s only job is to introduce steam evenly, let it fuse, and pull it back out. If steam pressure sags mid-cycle, the far corners fuse late; if condensate pools, the low point cools. Both show up as defects you cannot see until the block is cut.
\n\n
What the line is sized to deliver
\n
Block molding machines in the SPB-2000 to SPB-6000 range run block lengths 2,000–6,000 mm at about 12–15 blocks/hour at 15 kg/m³. That throughput assumes a steady steam supply at the die — not just at the boiler. The accumulator is what protects the die from boiler swings.
\n\n
| Stage | Role | What goes wrong without it |
|---|---|---|
| Accumulator | Buffers pressure swings | Pressure sag at the die, uneven fusion |
| Pressure staging | Low then high steam | Skin over-expands before core fuses |
| Drainage / vacuum | Removes condensate | Water cools steam, pits the surface |
\n\n
Steam quality (dryness)
\n
Fusion needs dry saturated steam, not a wet mix of steam and water. Wet steam carries water into the bead bed, cools it locally and leaves pits. Keep steam as dry as practical between boiler and die — proper trap discharge and a short, insulated run matter more than operators expect. The symptom of wet steam looks like a molding fault but the cause is upstream in the steam line.
\n\n
The accumulator: why it matters
\n
A steam accumulator stores energy so the die sees a flat pressure even when the boiler dips or several machines draw at once. Without it, every boiler fluctuation becomes a fusion defect. Size the accumulator to the die\’s peak demand, not the boiler\’s average — a good rule of thumb is enough stored energy to cover the highest-pressure hold of your longest cycle plus the draw of any second machine sharing the line.
\n\n
Pressure staging
\n
- \n
- Low-pressure fill steam. Penetrates the bead bed and starts gentle fusion without blowing the bed apart.
- High-pressure fuse steam. Completes fusion through the block once the bed is settled.
- Vent and vacuum. Pulls steam and condensate out so the block sets and the cavity stays dry for ejection.
\n
\n
\n
\n\n
Steam traps
\n
- \n
- What they do. A trap discharges condensate while holding steam — a failed trap lets water into the die or steam escape to waste.
- What to watch. A trap that discharges continuously is wasting steam; one that blocks is sending water forward. Both show up as defects at the block.
- Service interval. Include traps in the same scheduled service as the rest of the steam loop; they are small parts with outsized effect.
\n
\n
\n
\n\n
Drainage and vacuum
\n
Condensate must leave the die fast. Blocked drainage leaves water at the low point, cools the steam there, and pits the surface. A healthy vacuum pulls down quickly and leaves the bead dry — the same vacuum discipline that keeps a shape molding machine clean applies here.
\n\n
Reading the pressure curve
\n
A healthy cycle shows a flat low-pressure hold, a clean step to high pressure, then a vent. A sag during the hold means the accumulator or line is undersized; a slow step means a valve is sticking; a poor vent means drainage or vacuum needs attention. The curve is the fastest diagnostic on the line — log it during commissioning and compare weekly.
\n\n
Sharing steam with the pre-expander
\n
If the moulder and the pre-expander share a boiler, their draws overlap at the worst moment. An accumulator at the moulder smooths the moulder\’s draw; a separate buffer or timed sequencing smooths the shared boiler. Without buffering, one machine\’s demand becomes the other\’s defect.
\n\n
Common steam-system mistakes
\n
- \n
- No accumulator. The die rides boiler swings; fusion scatters machine to machine.
- Skipping pressure staging. One flat high pressure over-expands the skin before the core fuses — brittle outside, loose inside.
- Ignoring traps. Failed traps send water into the die; the symptom looks like a molding fault but the cause is upstream.
- Undersized line. Even a perfect accumulator cannot help if the pipe to the die drops pressure under load.
- Wet steam ignored. Treating pitting as a molding problem instead of a steam-quality problem wastes weeks.
\n
\n
\n
\n
\n
\n\n
Frequently Asked Questions
\n
Do I need an accumulator for one machine?
\n
If your boiler holds pressure steady under the die\’s peak draw, you can run without one — but most plants add an accumulator the moment a second machine shares the line, because boiler swings then reach the die.
\n
Why stage pressure instead of one setting?
\n
Staging lets the bead bed settle before full fusion, so the block fuses through rather than skinning over. One flat high pressure tends to over-expand the surface.
\n
What is the fastest drainage check?
\n
Watch for water at the die\’s low point after a vent cycle and confirm the vacuum pulls down quickly. Slow pull-down or standing water means drainage needs attention.
\n
Does steam affect cycle time?
\n
Directly. Stable pressure and fast drainage shorten each cycle; pressure sag and trapped condensate stretch it. The accumulator and clean traps are the cheap wins.
\n
How do I know steam is too wet?
\n
Pitting that appears at the low point of the cavity, a cool die face, or a trap that runs continuously are the usual signs. Dry the steam line and re-check before touching the molding program.
\n\n
The steam system is the quiet determinant of every block you ship. For an accumulator and steam-line layout matched to your block molding machine, contact our team.
\n’}”>contact our team.